.png?width=212&name=Prospect%20by%20IrisVR%20Black%20(1).png)
Multiuser Meetings have collaboration at their core. The ability to connect with users spread out all over the world in one virtual location opens up new possibilities for your client walkthroughs or internal design meetings. That said, VR Meetings come with their own norms and etiquette (much like conference calls or meetings via Zoom or GoToMeeting).
Our team has hosted hundreds of VR Meetings and we’ve learned a few tips and tricks to keep things moving and make your Meetings hit peak productivity.
UPDATE: VR meetings are now available for Oculus Quest! Our new collaborative workflows make it easier than ever to get everyone on the same page with VR meetings, no matter where they're joining from or what kind of headset they're using. Learn more here.
Test your VR experience
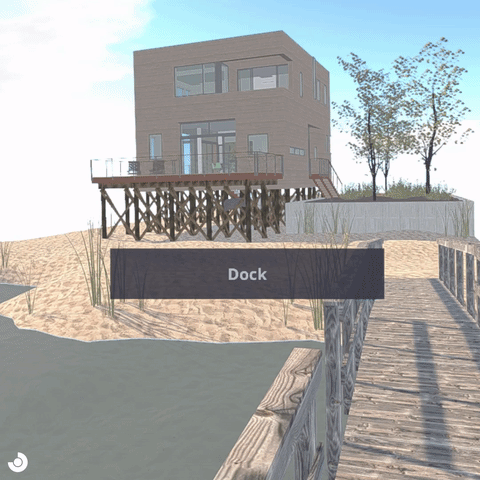
Performing a test walkthrough of your model is one of the most important steps for hosting a successful meeting, but it’s often one of the most overlooked, which is why it is at the top of this list. VR offers a new and unique perspective of your 3D model, but because the virtual world is true to scale, even the smallest modeling mishaps become noticeable issues. Testing out your model ensures that your Meeting will go smoothly and avoid distractions.
Make sure your VR headset is set up before the Meeting
It’s equally important to make sure that everyone involved can attend your meeting and has the necessary hardware set up so that the meeting can start without delay. If you’re the organizer and host, it’s especially important to make sure to get into VR before other attendees. Otherwise, when guests arrive, they’ll be in VR by themselves.
Sort and filter Viewpoints ahead of Meeting time
Before sharing your file, build a sequence of Viewpoints that tell the story of your space in a meaningful way. Practice going through this sequence to be sure you appropriately communicate your vision and hit every discussion point or problem area. Establishing a strong narrative from the outset will keep the group unified and moving together throughout the presentation.
Share your 3D model in advance
Since some files are quite large and slow connections may affect your upload time, make sure you share your files with your guests in advance of the Meeting (once everyone can access the file, they will be able to launch into VR in seconds). The last thing you want is for your meeting to get off to a late start while waiting for a file, which cuts into your walkthrough time.
To solve this problem, our team uses WeTransfer to send large files.
Make sure everyone understands their VR headset’s audio settings
The Oculus Rift and HTC Vive headsets have built-in microphones - meaning that everyone can hear everyone no matter how far apart they are in VR (there is no mute button).
At the beginning of the Meeting, once all attendees have joined, we recommend having the organizer mention this to all attendees. This will make people more comfortable and will eliminate the potential for an awkward situation where someone speaks without realizing that they’ll be heard.
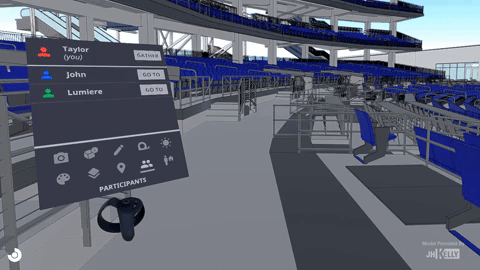
Use built-in tools to keep everyone together
Walkthroughs in VR give users the unique ability to travel through a space very quickly - it’s easy to instantly teleport 30-40 feet across your model. When leading a VR Meeting, it is important to keep in mind your guests will be excited to explore your building for the first time and might move at their own pace.
In order to keep your group together throughout your walkthrough, use the Gather and Go To tools. Gather will bring all other attendees to your exact location, whereas Go To lets you instantly teleport to another attendee’s location.
Make sure everyone has the same to-do list after the Meeting
UPDATE: With the release of Prospect 2.4, you can automatically create a Report during your design review session or VR Meeting and download it as a PDF. Reports contain screenshots, flagged elements, notes, and action items. Read more about Reports here.
In-VR tools like Annotations and Inspect Element make it easy to collaborate and lead in-depth discussions about elements in your model. Once you perform your walkthrough and identify any items that require changes, be sure to take some time at the end of the Meeting to discuss new action items and set expectations.
There are a few ways to do this. One of the quickest ways is to take screenshots of your markups, annotations, and flagged elements while in your Meeting. These screenshots automatically save to your desktop and can be dropped into our In-VR Meeting Notes template. If you’re a Revit user, you can export a CSV of flagged elements from your VR walkthrough. We want you to leave your Multiuser Meetings with concrete action items and ultimately help you create better design outcomes.
We’re continuously building new features to improve the post-VR walkthrough process. Stay tuned for new features.
