.png?width=212&name=Prospect%20by%20IrisVR%20Black%20(1).png)
Our friends at Robert A.M. Stern Architects (aka RAMSA) have contributed this guest post - it details their precise workflow in Photoshop, Revit, and Rhino for creating realistic water in VR.
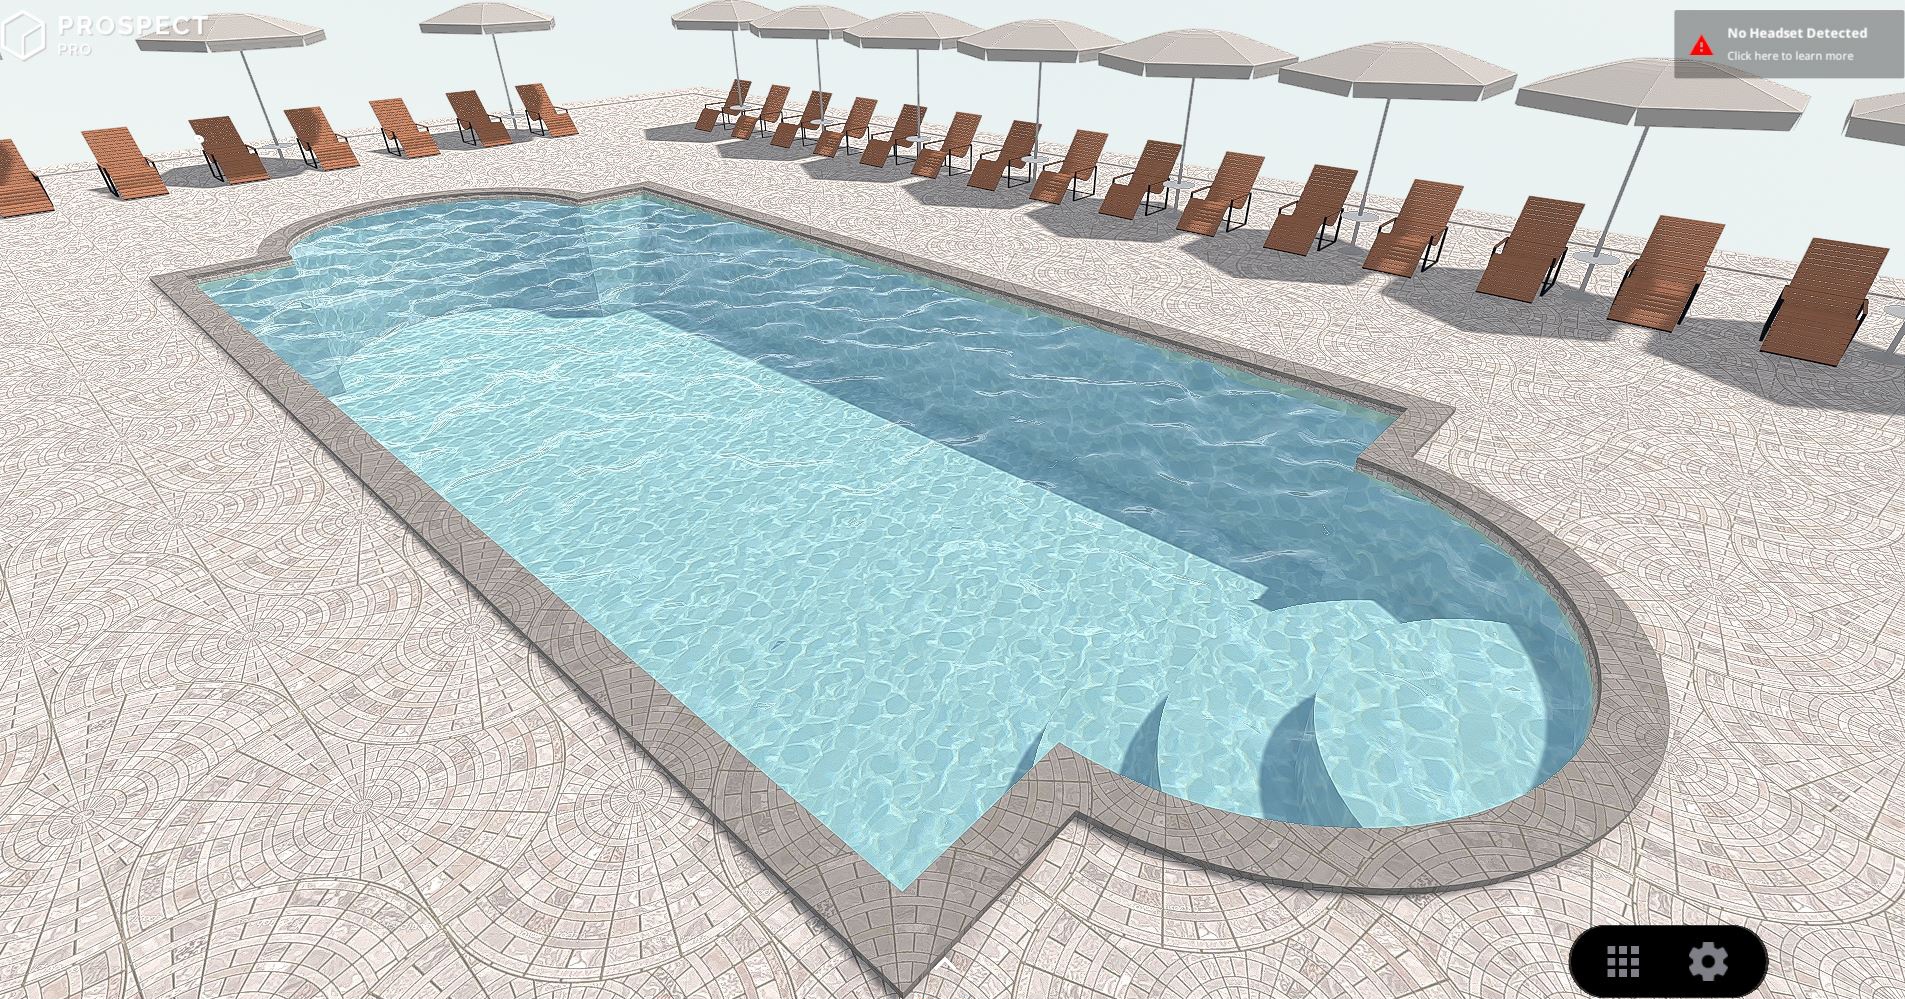
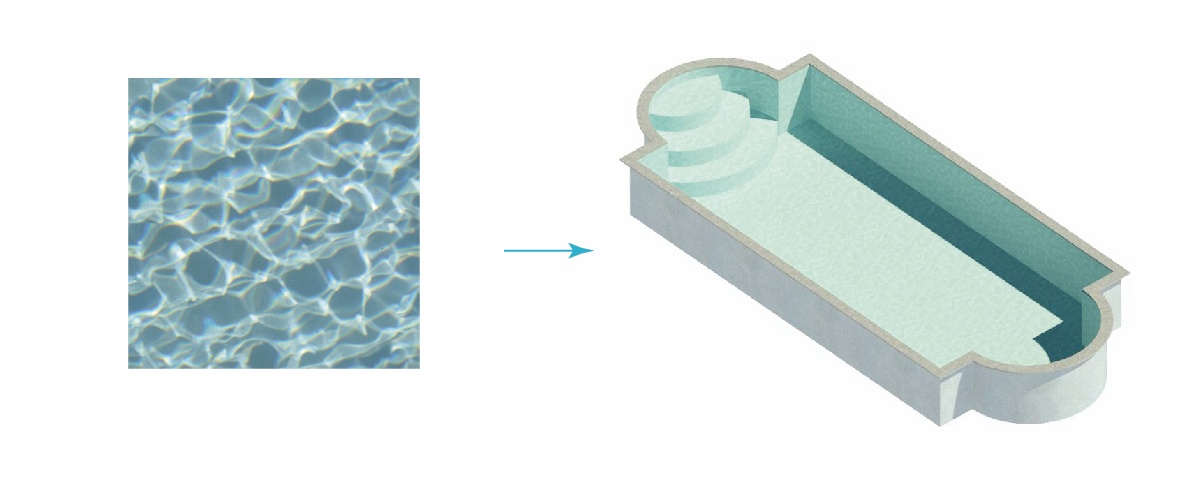
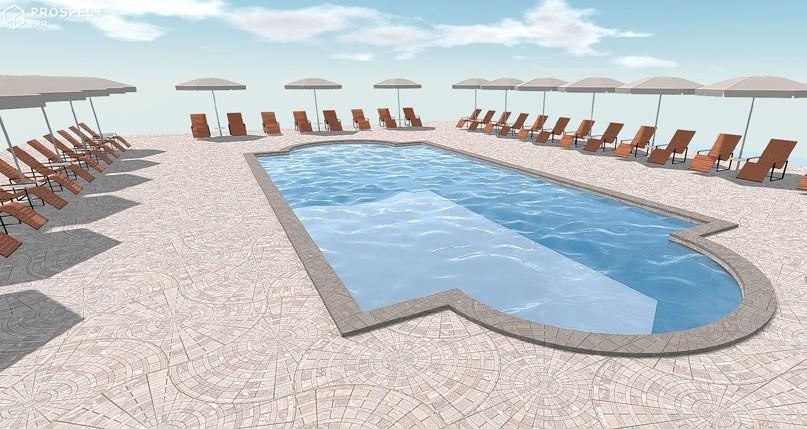
An example of more realistic water created through the RAMSA workflow. Scene and design intended for demonstration purposes only.
When presenting a project in VR at RAMSA, context is vital to telling a compelling visual narrative. Water is often the most important contextual element, as it allows the viewer to understand the building’s relationship to the surrounding landscape. Unfortunately, while Prospect has been instrumental in delivering beautiful, immersive VR experiences to both our internal and client meetings, our team was challenged in finding a way to accurately represent water.
Our first issue was with the standard Revit water texture. When applied to pools and other bodies of water, Prospect would render them as grey planes. The next best solution was to switch the water material to glass. However, even that proved insufficient.
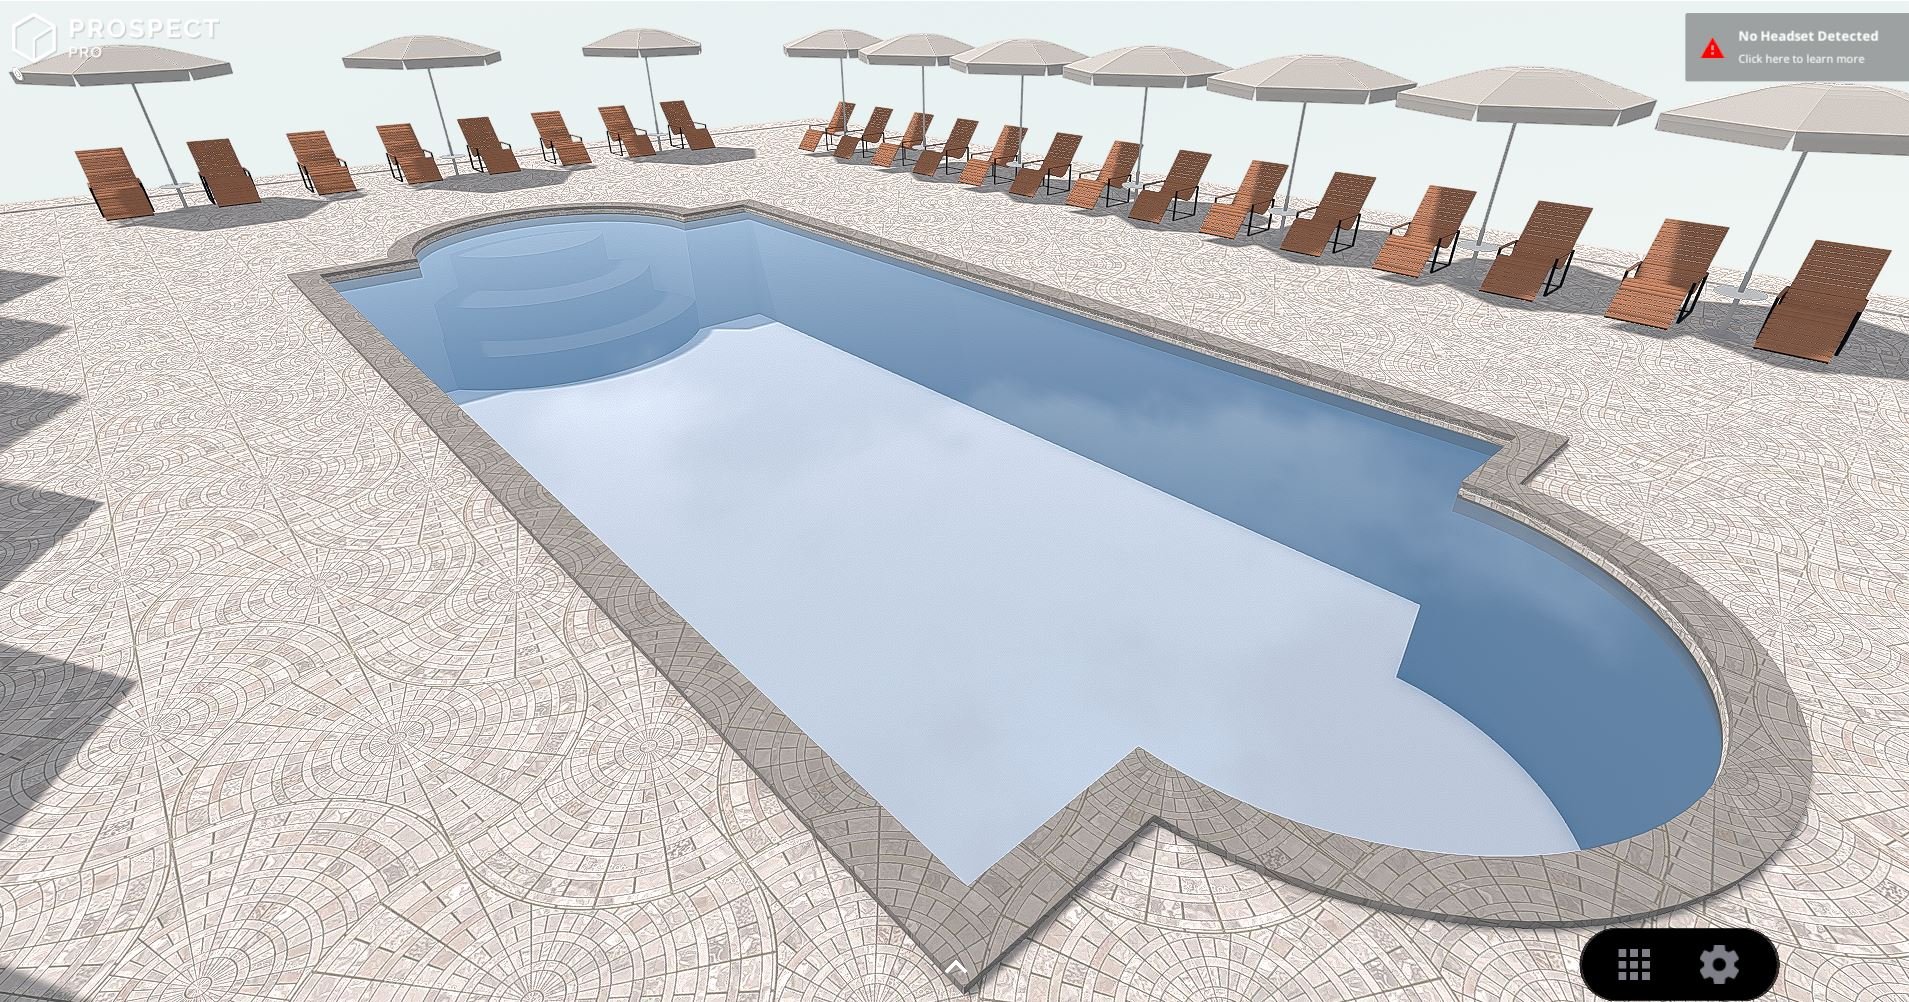
An example of the glass "water" plane in Prospect. Scene and design intended for demonstration purposes only.
In one of our recent projects, the Design Technology team was asked to find a realistic water workaround for a beachside resort project. The project had multiple water features including two full-size pools, two hot tubs, and the ocean.
In this tutorial, we’ll share the workflow we used to solve the challenge of creating realistic water in Prospect.
How We Approached The Problem
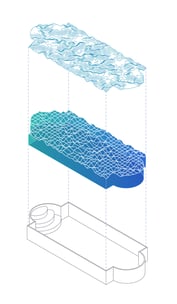
Before we dive in, it might be helpful to understand how we approached the problem. Since Prospect cannot read water, we decided to use something similarly reflective: glass.
We could not use a bump map to represent the water, so we decided to physically model it. Rhino can generate topography from images and export them as DWG’s, while Revit can convert topographical CAD information into native Revit topography. Thus, we decided the best way to model the water was to extract the topographical information from a seamless water pattern in Rhino and export it to Revit. Glass was then applied to the resulting Revit topography, and a refractive pool material was added to the pool walls and floor for more realistic representation.
The Step-By-Step Process for Creating Water in VR Using Photoshop, Revit, and Rhino
You’ll need the following to complete the workflow:
- A seamless “wavy” water material for the contour map (please note that a refractive pool pattern for this portion will not work)
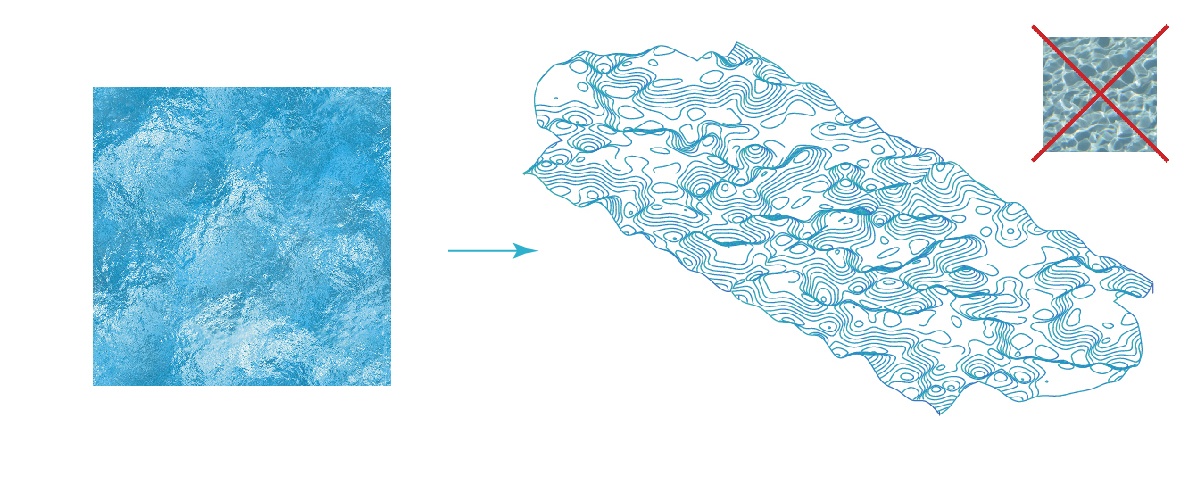
- A water texture for rendering purposes (please pay attention to the scale of the texture)
Part I: Photoshop
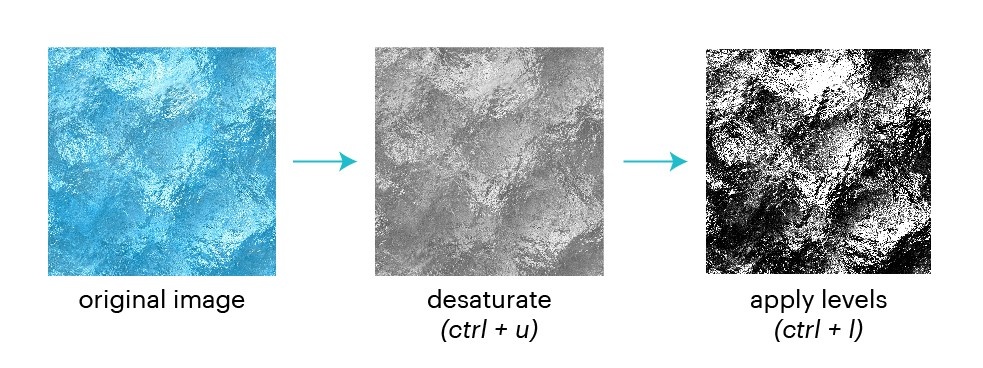
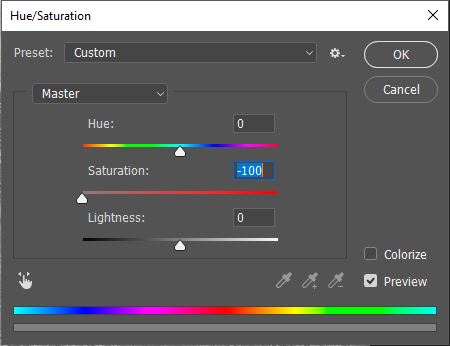
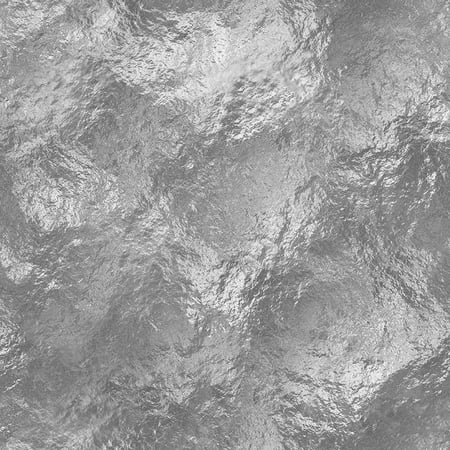
Open the first wave image in photoshop. Then, desaturate the wavy water image into black and white (use the Ctrl + U shortcut).
Your image should look like this:
Use Levels (type Ctrl + L) within Photoshop to make the blacks and whites more prominent within the image.
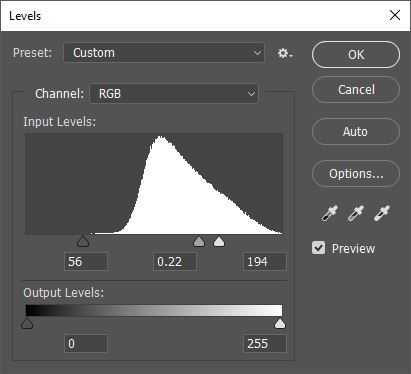
Your image should now look something like this:

This will allow Rhino to read the highs and lows of the waves better. Save the image as a .jpeg somewhere you can access easily.
Part II: Rhino
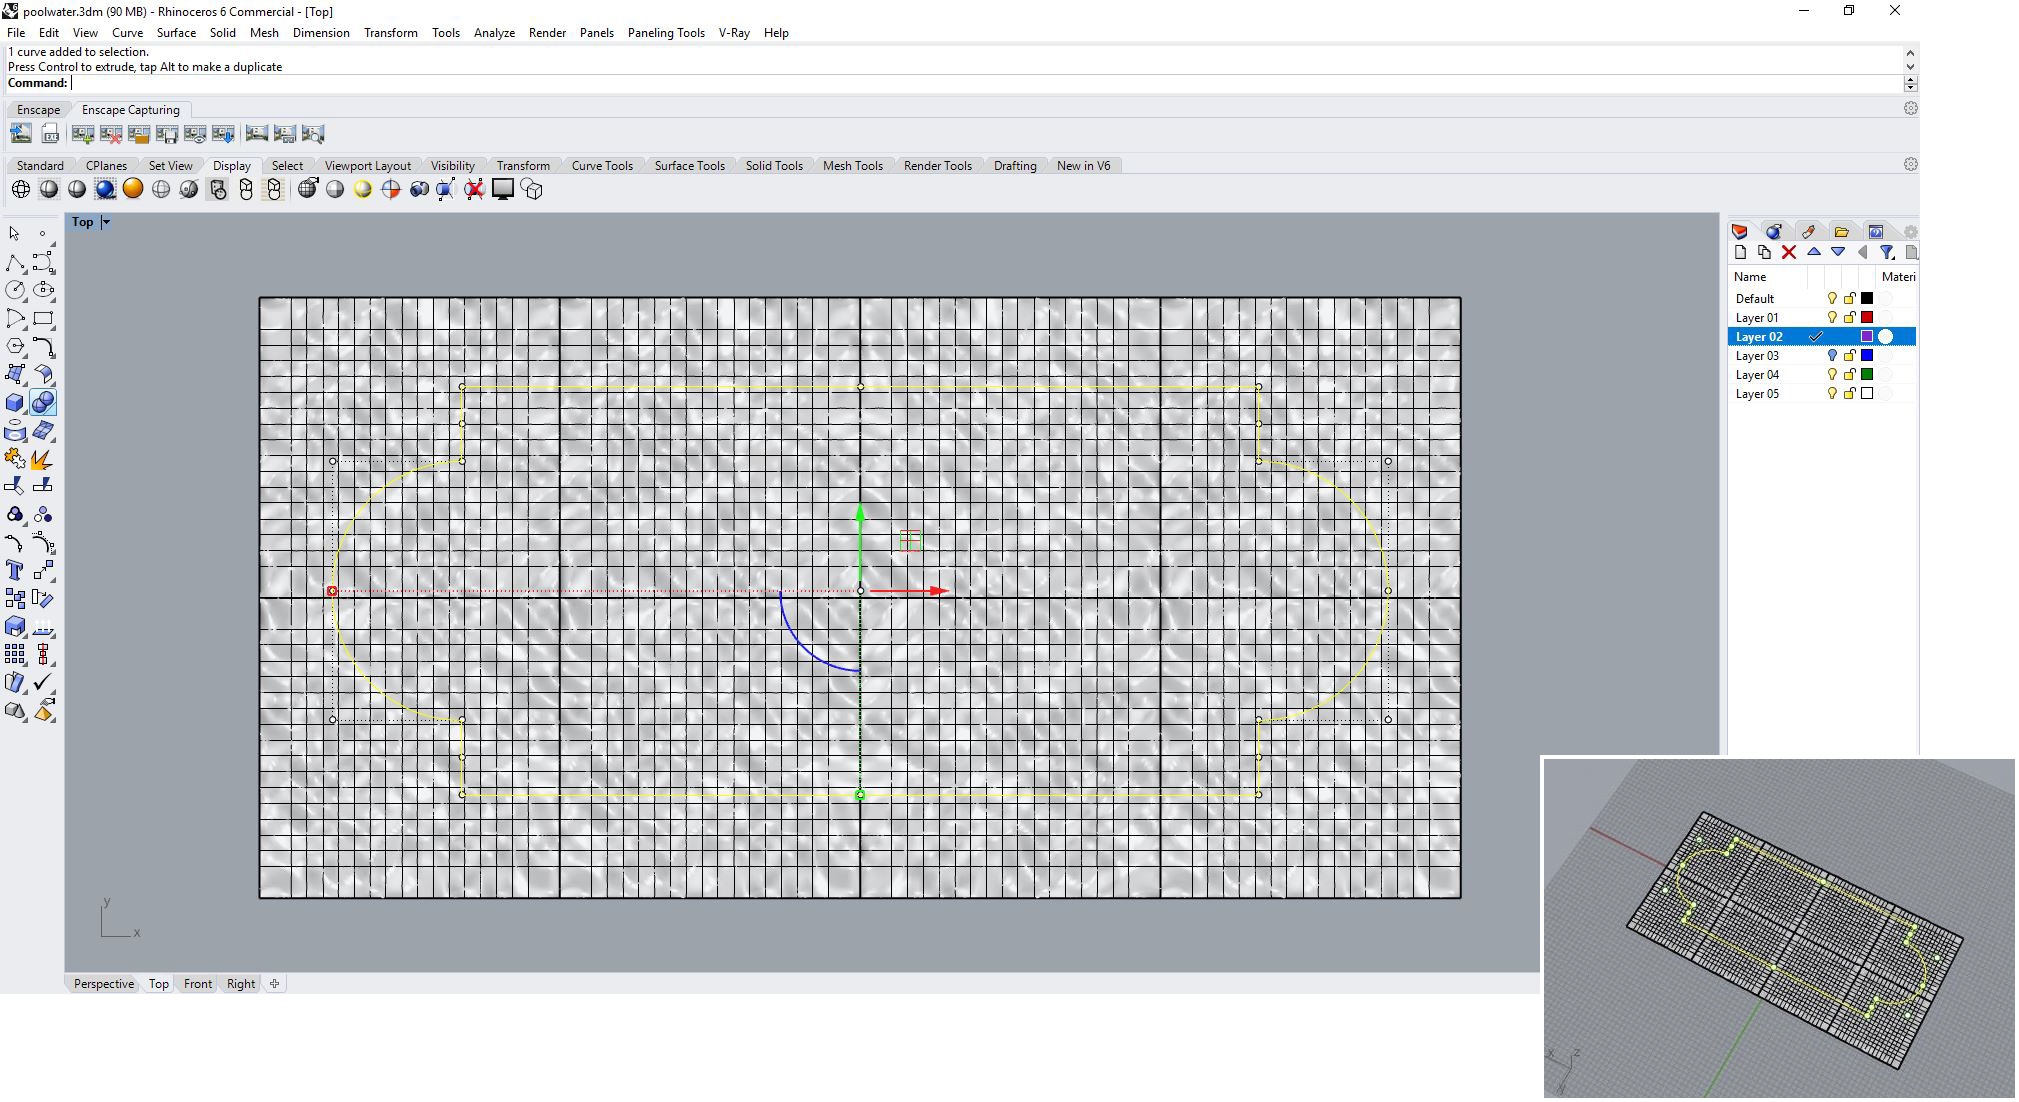
Next, we will create a contour map with the image in Rhino. First, open Rhino, and create the pool or body of water's general outline so that you have something to refer to. The pool in the below example is approximately 60' x 20'.

Next, type in the command "Heightfield." Heightfield creates contour maps out of images.
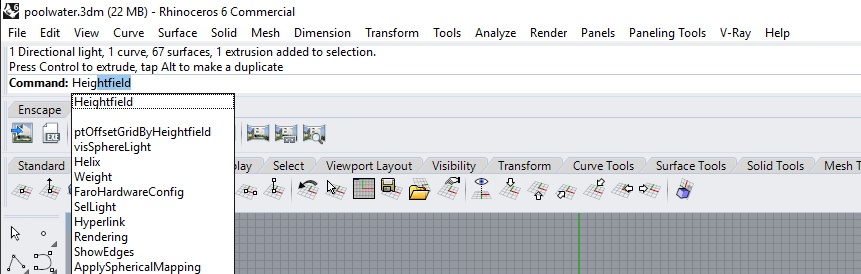
Once you type in the command, you’ll be prompted to open a bitmap. Choose the black and white wave image made in Part I of the tutorial - you will then be prompted to draw how large the image needs to be.
Bring in the water at a scale that works for your project - ours was at about 15’ x 15’.
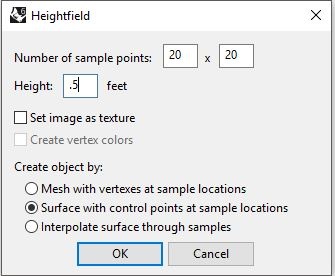
Once you’ve drawn the box the prompt below will appear. Type in 20 x 20 sample points, and a height of 0.5 feet. The higher the number, the higher the wave.
You should get an image like this:
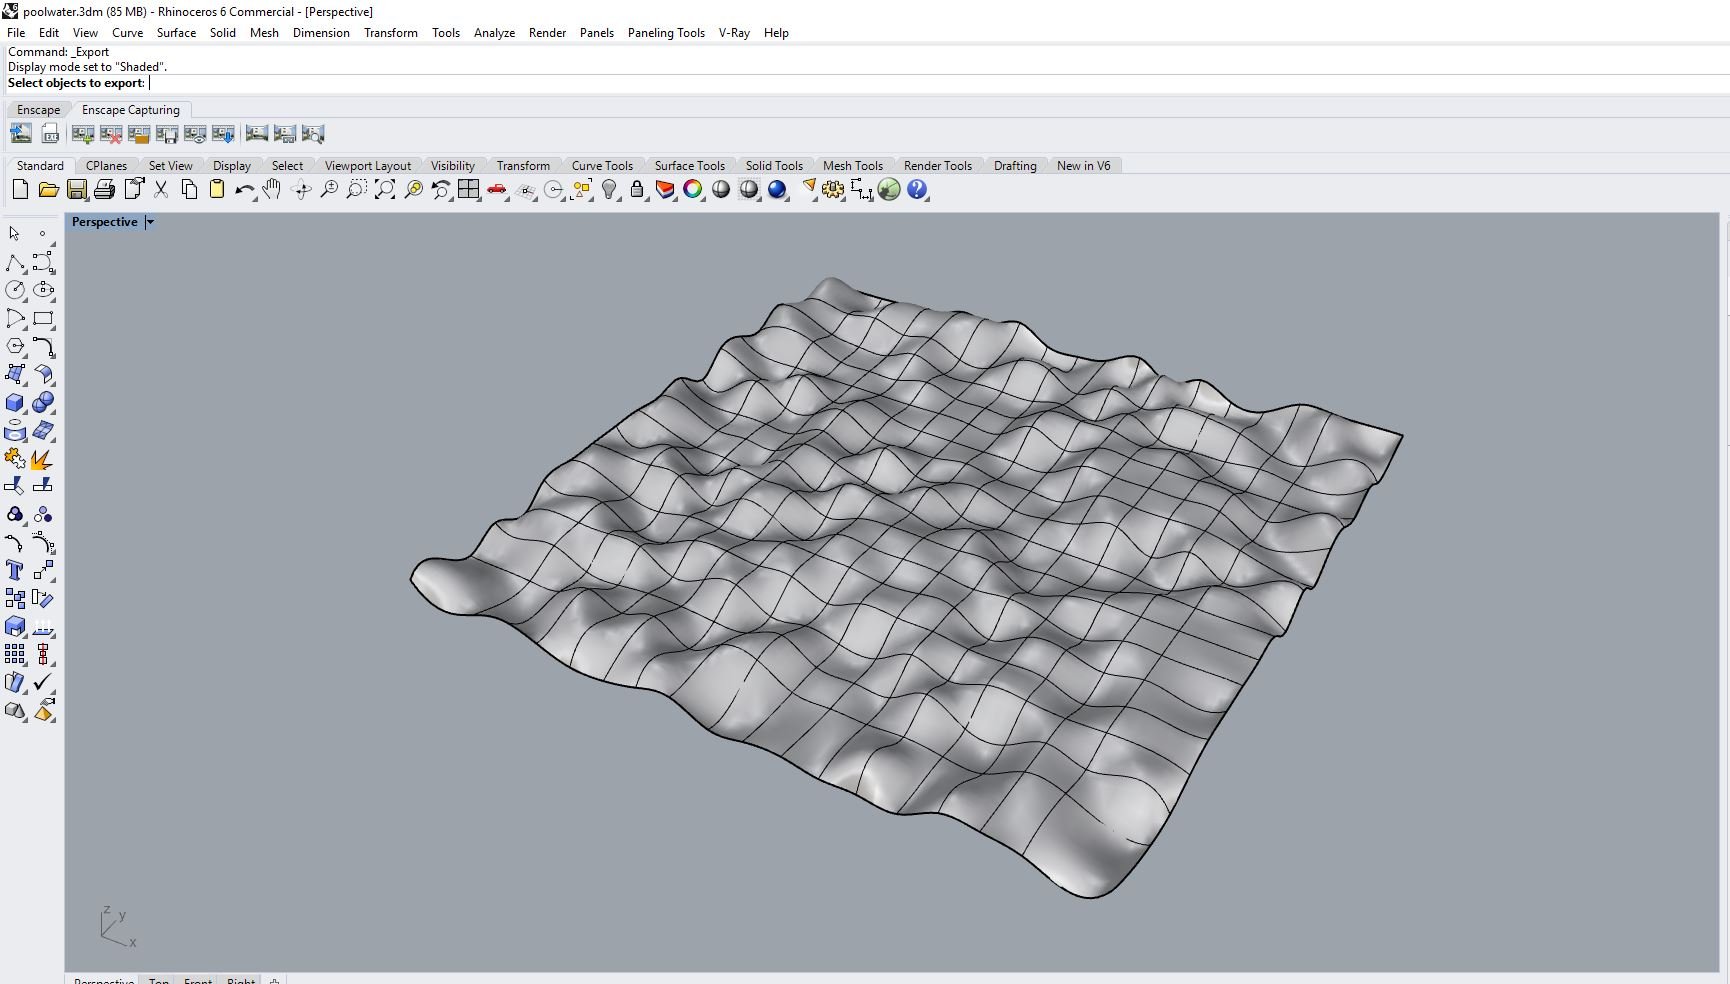
Tile the resulting contours in a shape that is a little larger than the pool outline. We will subtract the extra later in Revit. Mirroring the tiles ensures that the raised contour edges connect seamlessly between tiles, and the regularity of the pattern will not be noticeable in the final result.
Next, we want to extract the topological information (or contours) from the tiles.
Maximize the Right or Front Viewport in Rhino so that you can see the contour tiles from the side. Type in the command, “Contour” - you will be prompted to “Select objects for contours”. Select all the contour tiles created and press Enter when done.

You will be prompted to choose the contour plane base point. Select a little below the lowest contour and draw a perpendicular line up to above the highest one:
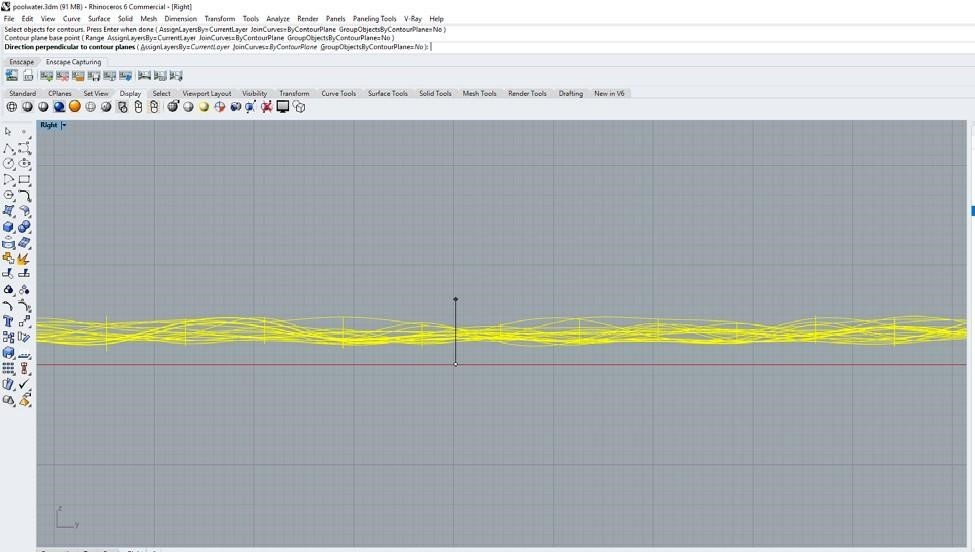
You will then be prompted for a distance between contours - type in 0.25” then press Enter.

The contours will begin to generate one at a time. At the end, you should get something that looks like this:
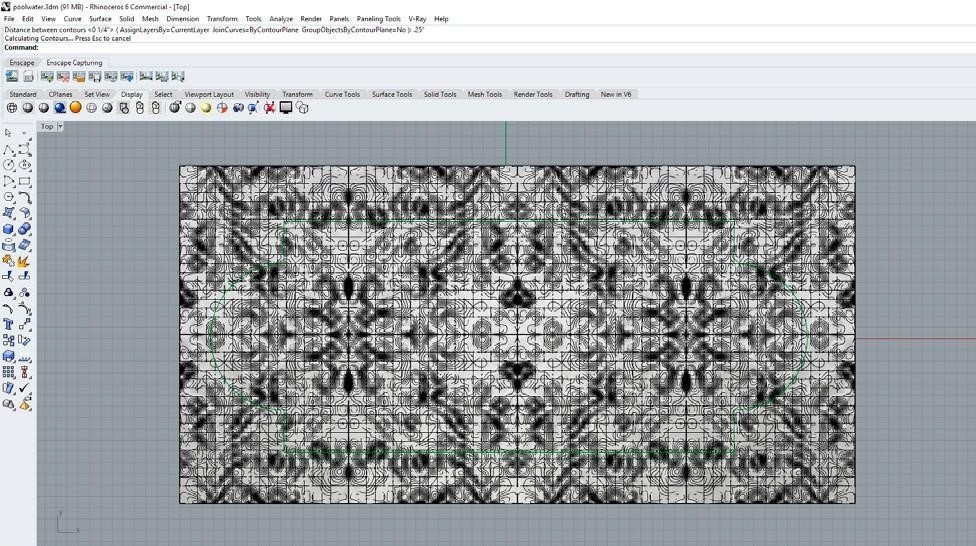
Select the surfaces and the pool outline and type “hide” so that you are left with only the contour lines. Select the contour lines and File > Export the selected as a DWG. Save in the same location as the modified water image.
Part III: Revit
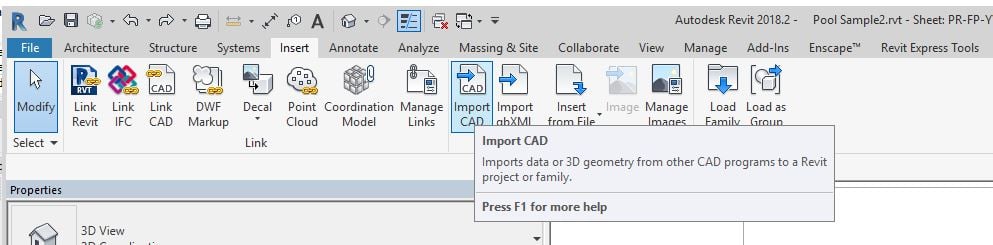
Now we will convert the contour lines from Rhino into a topography in Revit. First, open Revit, then Insert > Import CAD. We are importing the CAD (though will be deleting it later).
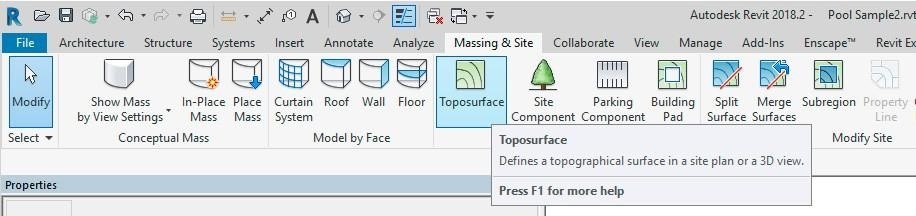
Under Massing & Site, select Toposurface.
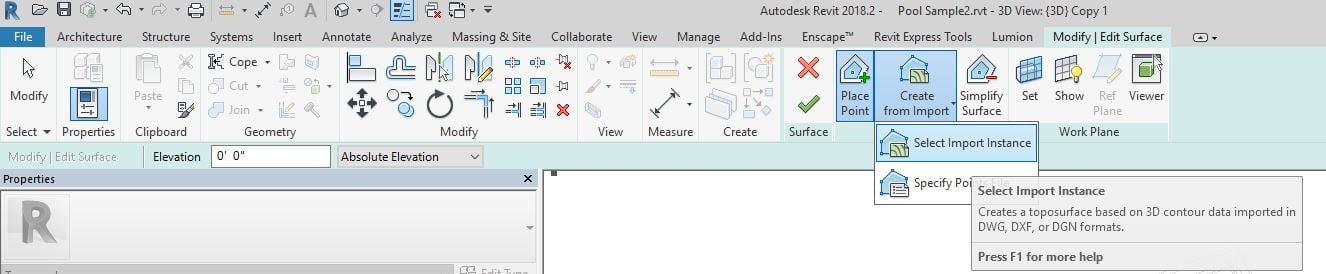
Next, select Create from Import > Select Import Instance.
Select the imported CAD. The Add Points from Selected Layers window will pop up.
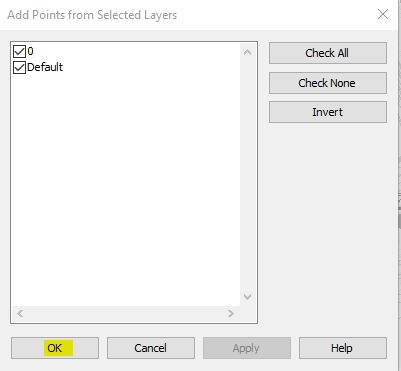
Press ok and select the green checkmark to complete the surface.
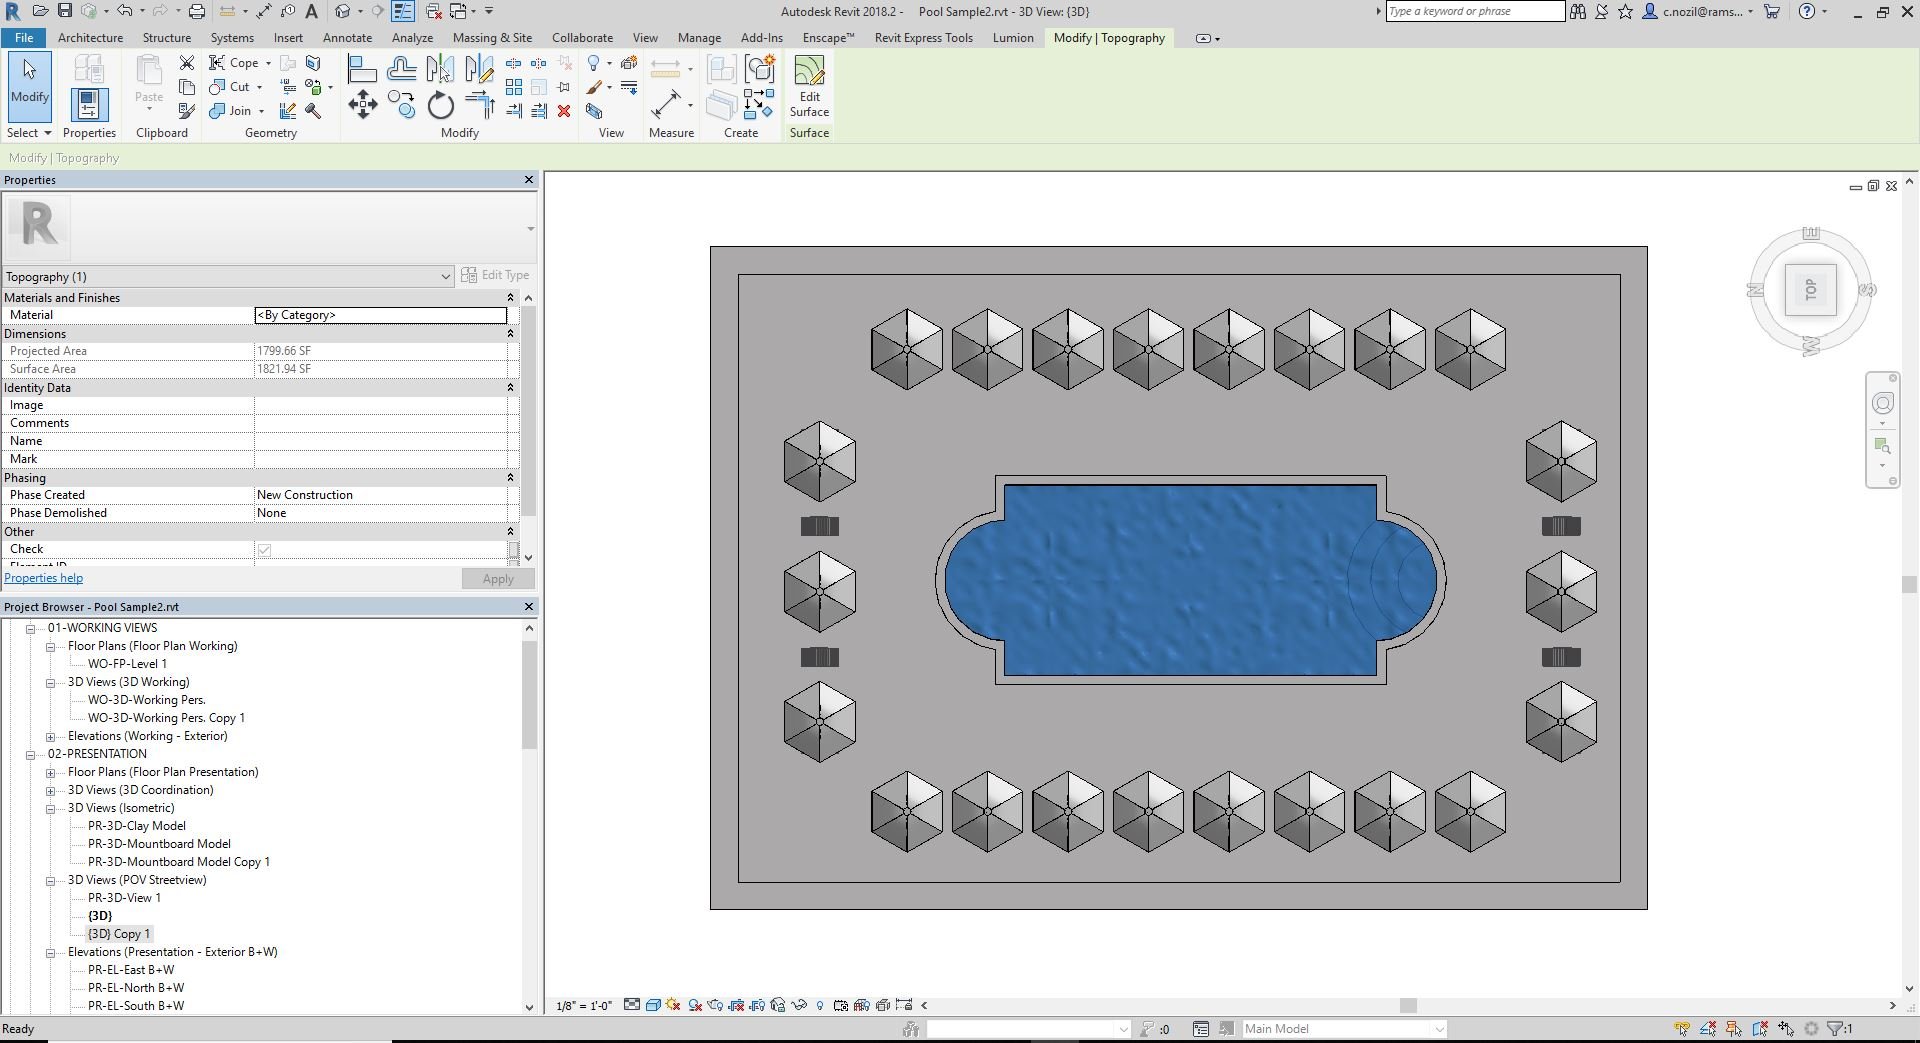
Now we will change the material to glass. Select the resulting topography and change the material to glass in the Properties panel:
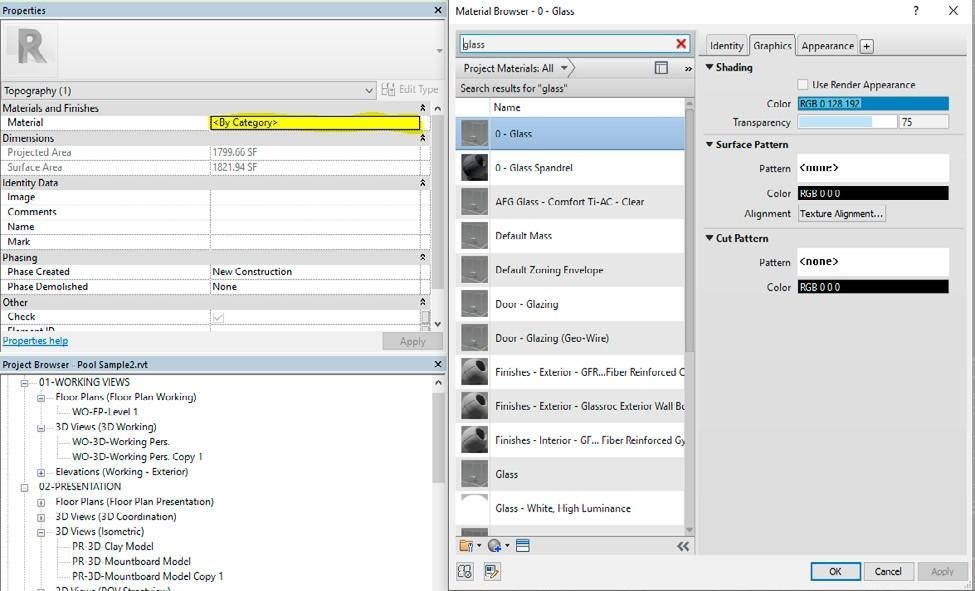
Press OK. Now place the topography in its final location (this step assumes you already have an empty pool modeled).
Scene and design intended for demonstration purposes only.
Now we will clip the topography so it fits in the pool.
Go to Massing & Site > Split Surface.

Select the Topography (it might be easier to do so in the wireframe view). Use the pick lines tool to select the outline of the pool:

Select the green checkmark to complete the operation. Now that the topography is split, you can delete the extra outside the pool outline. You can now preview it in Prospect to see how it looks!
Scene and design intended for demonstration purposes only.
If you want the water to look even more believable, you can add refracting light patterns to the walls and floor of the pool using the seamless image of reflected light (discussed in the beginning of the tutorial).

We used these material settings for the image:
- Color: RGB 191 247 243
- Image fade: set to 31
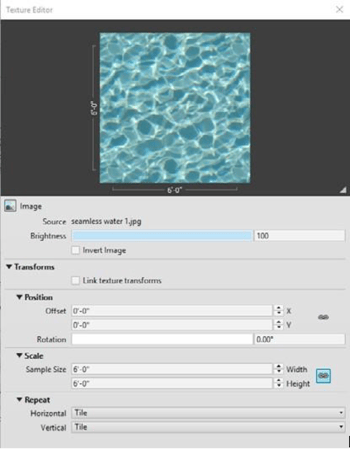
In the Image Settings change the Scale Sample Size to 6’.
Apply the resulting materials to the pool walls and floor. The resulting image should look like this:
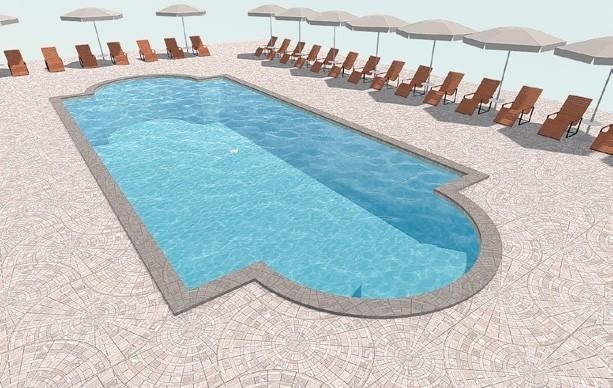
Scene and design intended for demonstration purposes only.
You can use this process to create other kinds of realistic water features as well, including oceans, rivers, etc.
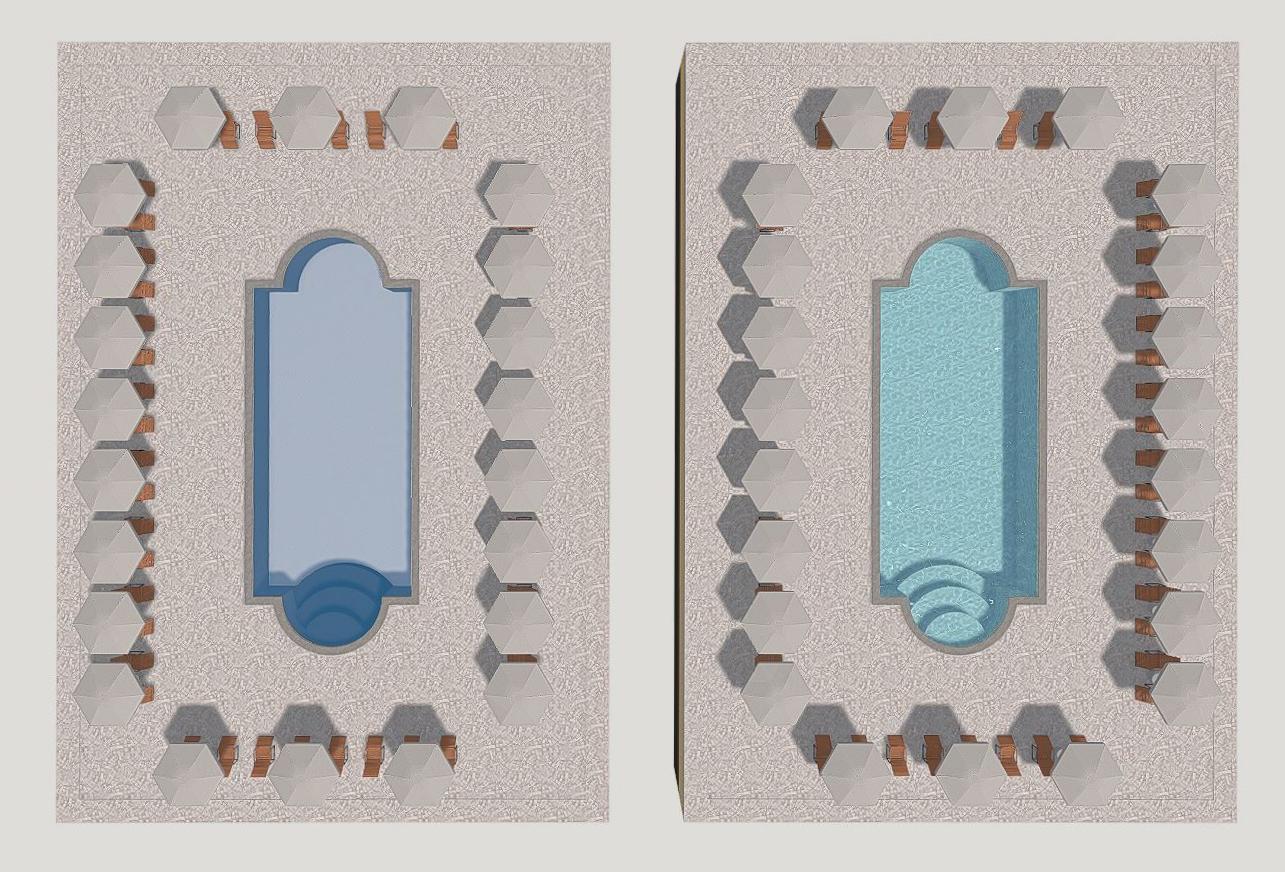
The before and after results of completing this workflow. Scene and design intended for demonstration purposes only.
