.png?width=212&name=Prospect%20by%20IrisVR%20Black%20(1).png)
Being able to explore and understand your projects spatially is one of the strengths of virtual reality in the AEC industry. What makes the use case even more compelling is the ability to confidently make informed design decisions based on the tools and visuals available. One such tool is Sun Settings in Prospect, which makes use of location data ingrained in your files to produce accurate direct lighting in VR for daylighting studies.
Natural light has been shown to improve health and productivity and is a driving force behind most new buildings (many building codes now require all building occupants have access to daylight). Analyzing how and where fenestrations allow light to pour into a building can help inform critical decisions pertaining to building orientation, layouts, interiors, as well as finish and FF&E choices. Additionally, high performance building projects striving to make use of passive heating/cooling techniques or achieve LEED certification can utilize these types of analyses to their benefit.
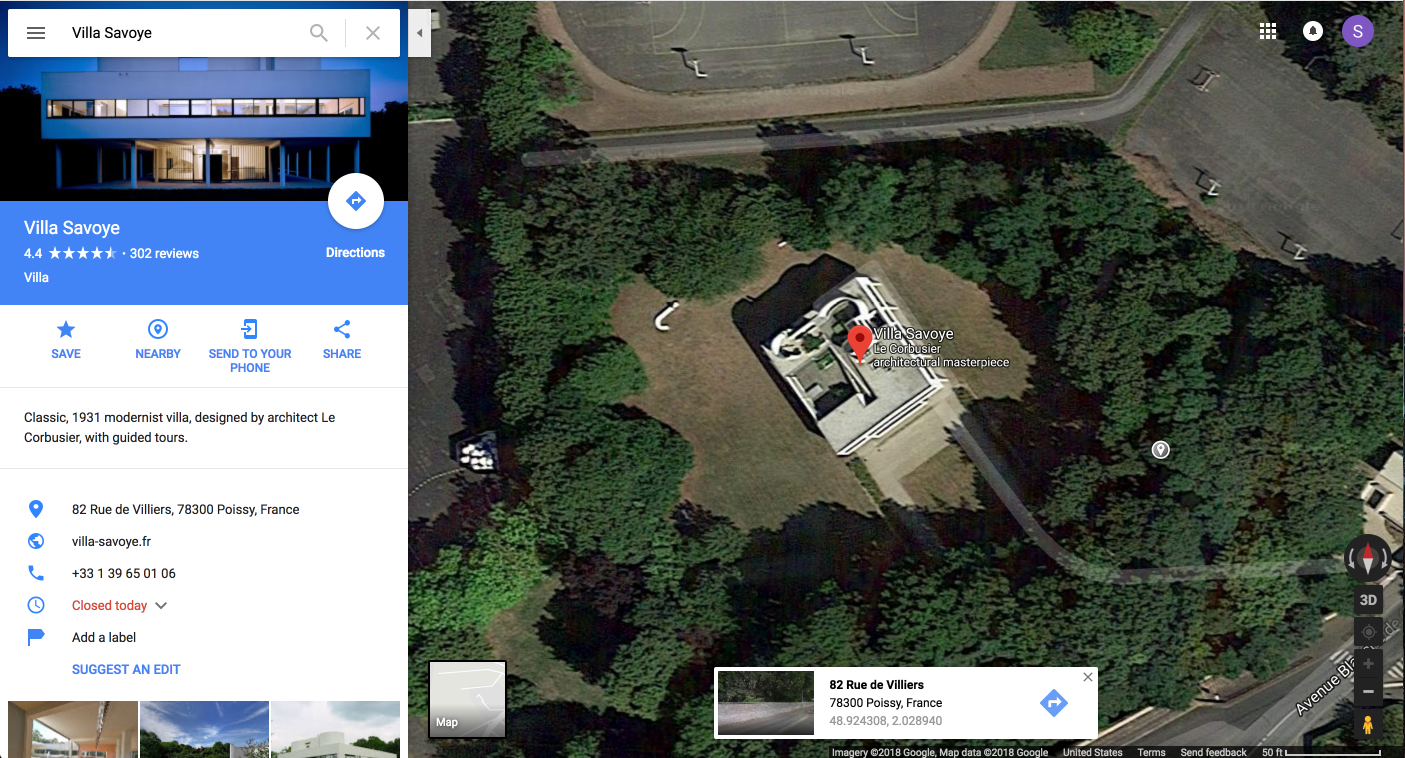
This post will give an overview of how to achieve accurate geolocation in Revit, Rhino, and SketchUp files and translate that experience into daylighting studies in VR. To highlight these concepts, we’re using Corbusier’s Villa Savoye.
How to Add Location Data to SketchUp, Revit, and Rhino Files
All SketchUp, Revit, and Rhino files have default values for latitude and longitude. In order to make sure the daylighting you see in Prospect is as accurate as possible, we strongly encourage users to input their own latitude and longitude information into their models.
There are two different aspects to consider when adding location data:
- Exact location data (a city, specific address, and/or coordinates)
- Building orientation with cardinal directions
Both data types will ensure accurate daylight and shadows while exploring your model in Prospect, especially when used together.
Adding Location Data to Revit
Step 1: Navigate to Manage → Location.
Step 2: Input the specific information you have available for your site location and press OK.

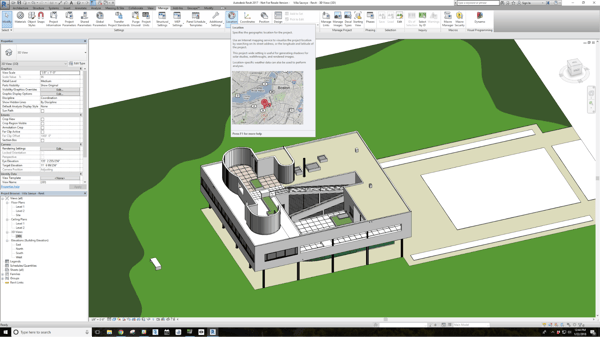
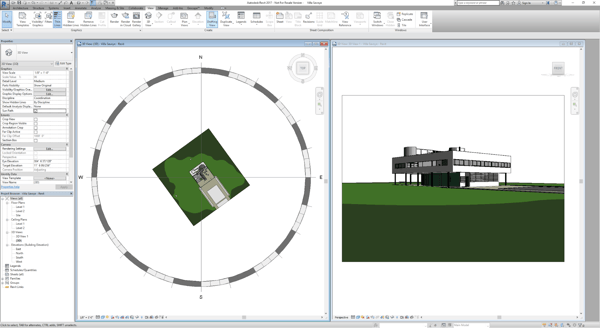
Step 3: Orient your project so it is properly aligned with the cardinal directions. The top of your Revit window aligns with North. Tip: Under Properties Menu → Graphic Settings → Sun Path, check the box to turn on Sun Path circle seen below, which can be helpful for this step.
Adding Location to Rhino
Step 1: Type ‘Sun’ into the command line, then press enter to pull up the Sun Options menu.
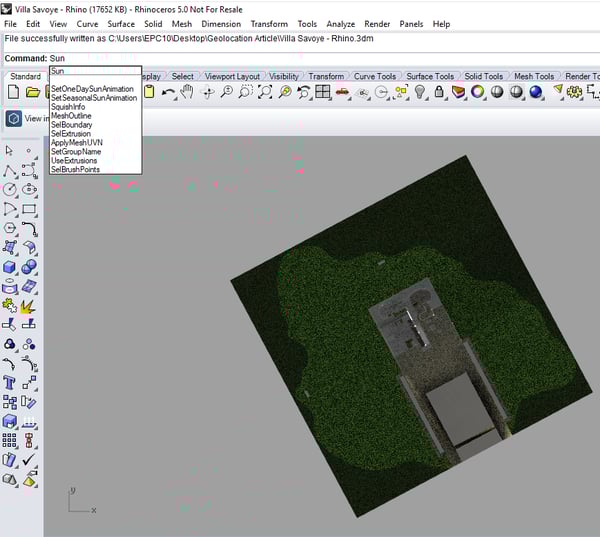
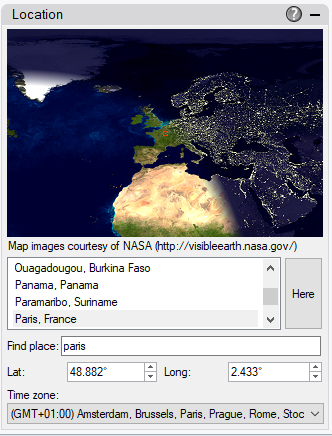
Step 2: Under Sun Options, make sure the ‘On’ box is checked before scrolling down to the ‘Location’ portion of this menu. Here you’ll input geographical coordinates and/or the City in which your project is located.
Step 3: Orient your project so it is aligns with the cardinal directions as the structure does or will upon completion. In Rhino, the Y-axis aligns with North.
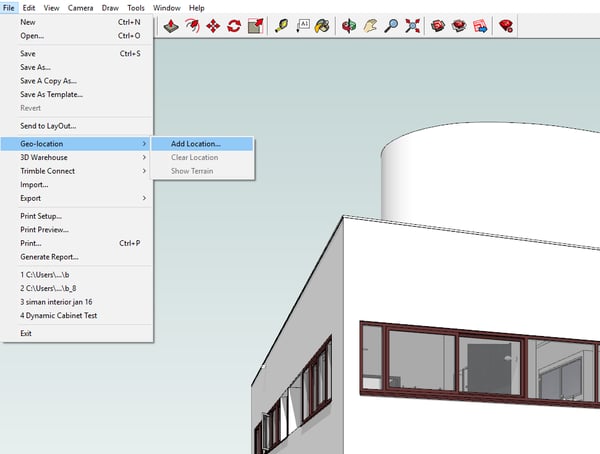
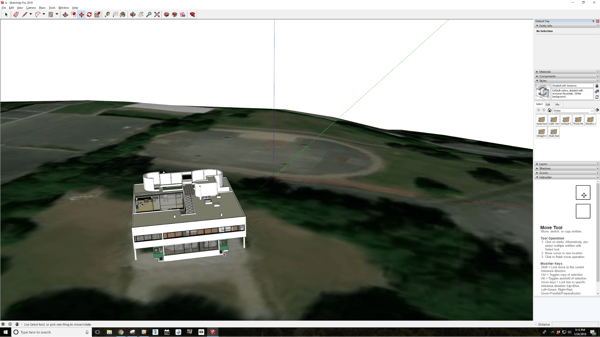
Adding Location in SketchUp
Step 1: Navigate to File → Geolocation → Add Location
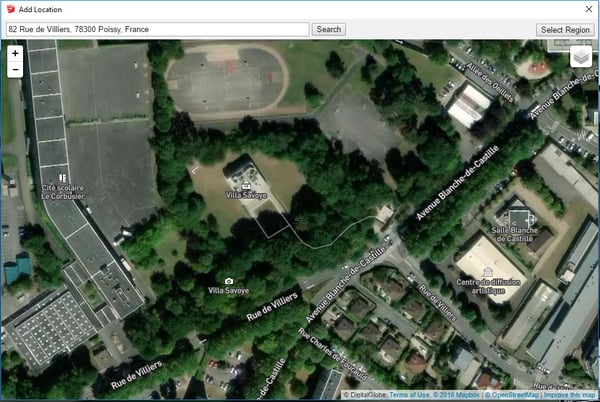
Step 2: Input the location of your model. Be as specific as possible! Press ‘Search,’ then refine the area you’d like to pull in with the ‘Select Region’ button.
Step 3: Use the Move and/or Rotate tool to position and align your project on the site. In SketchUp, the Green-axis aligns with North.
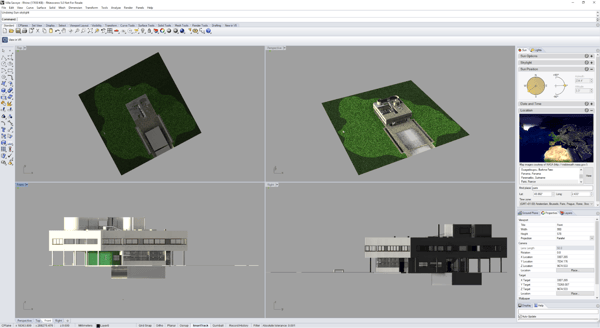
Performing Sun + Shadow Studies in Prospect
Performing daylighting studies is easy in Prospect. The built-in Sun Settings tool was designed exactly for this purpose. Revit, Rhino, and SketchUp files are all designed to store the WGS 84 location of the file's origin. In turn, Prospect leverages a third party library that uses standard scientific methods for determining sun, star and moon position at any given time of day - providing totally accurate sunlight and shadows.
To use Sun Settings, simply select the Sun icon on the main menu, and adjust the date and time accordingly to assess how natural light interacts with your structure. This tool works in all views of Prospect, including Scale Model Mode, Real Scale Mode, and Presenter Mode with the Desktop Menu.
Sun Settings are available to everyone using Prospect. Want to give them a try? Start a free trial today.
